Your Cart is Empty
- Our Services
- Shop Personalised Frames
- Corporate & Award Framing
- Gallery
- About Us
- Contact Us
- Visit Us
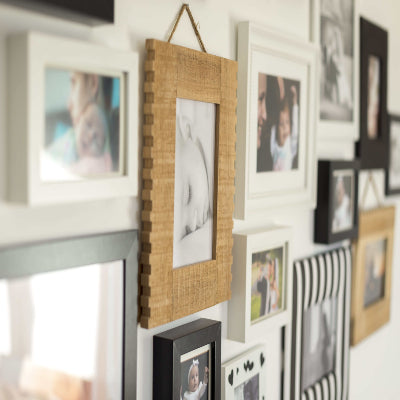
Whether you've got a large space on your wall that needs decorating or just want to bring more personality into your home, a gallery wall is a great option. It's the perfect way to showcase precious memories, transform a dead corner or add colour to a tired room.
But displaying multiple family photos or artworks of different sizes can feel overwhelming – especially when it comes to drilling holes in your wall. The good news is, with a little planning and care, creating a stunning feature wall doesn't have to be hard.
To help you out, we've put together a guide on how to arrange different size picture frames on a wall. Follow the steps below to create a head turning gallery wall in your home.
Whether you want to create a photo wall with family memories or a gallery wall featuring your favourite artworks – collect pieces which are meaningful to you.
A set of art prints by the same artist or a collection of photos from the same photoshoot will ensure your gallery wall is cohesive. But if you want a more eclectic look, choose a simple colour palette to help your pieces tie together nicely.
Some gallery walls work well with complete symmetry, but for a more organic look we recommend choosing different sizes and orientations. Choose some horizontal pictures and some vertical. Mix large pieces and smaller pictures. When arranged properly, the variety will create visual interest and balance.
When creating a feature wall, most people think of family photos and art prints. But non-traditional items like mirrors, wall hangings and framed puzzles can also work a treat. Your local framing studio can turn anything into art. Take in your travel souvenirs, treasured sports memorabilia or wedding stationery and they can frame it up ready for display.
Picture frames tell a story, just as much as the art work. The colours, materials and style of the frame can enhance your feature wall and help it tie in with the rest of your home.
We highly recommend getting custom frames for your gallery wall, especially if the artwork has financial or sentimental value. Custom frames have numerous benefits over ready made options. They're higher quality and offer better protection for your artwork. Plus, they're more affordable than you might think.
Your gallery wall might be the biggest feature in your living room, but it also needs to tie in with your existing interior style. For scandi and minimalist homes, natural pale wood or thin black frames tend to work well. An eclectic collection of frames with louder designs will work for boho inspired homes while gold and silver frames are perfect for glam and modern interior styles.

A little planning goes a long way with hanging wall art.
Once you've chosen all the pieces you want to hang, trace the outline of each one onto paper. Cut out the rectangles and use them to figure out the best arrangement.
Do this on the floor first, until you have a layout you like the look of. Then use painters tape to place the rectangles on the wall, exactly where you plan on hanging the real wall art. That way, you can fine tune the arrangement before nailing any holes in the wall.
All wall arrangements benefit from a focal point, which is often the largest show-stopping piece you have. We recommend starting with the larger frames in the middle of your arrangement before moving outwards with the smaller pieces.
Don't overcrowd your wall. Each framed artwork should be able to breathe and shine in its own right. The space between the different pieces is an important element in the overall arrangement.
Keep the spacing between each item even for a balanced look. Somewhere between 8 to 15cm is usually a safe bet.
Hanging picture frames on the wall can feel daunting, but it can actually be quite a quick and simple process. Keep the following tips in mind for a successful finish.
In general, it's best to hang the centre of your arrangement at eye level. Of course, every space is different. You might be working around living room furniture or competing with a cramped hallway. With your paper templates in place, take a step back and look at the arrangement from different points of the room.
Each of your picture frames should be levelled individually and they should be level with each other. Use a spirit level to straighten up your frames. You can use art gallery putty on the bottom corners to ensure the artwork stays in place over time.
Now that your feature wall is up, you can step back and admire your work. If you find that you want to change things up as your family grows or as the seasons change, you can always swap in new pieces.
If you need expert advice about how to arrange different size picture frames on a wall, chat with the team at Portfolio Picture Framers. We can help with frame selection, quality framing services, display and maintenance tips and more.
Call us on (08) 9330 5884 or drop into our Myaree studio.